Homemade Apple Cider: Your Easy Recipe for Delicious Fall Flavor
As autumn leaves begin to turn and a crisp chill fills the air, there's a particular aroma that instantly evokes feelings of warmth and comfort: the sweet, spiced scent of apple cider. While store-bought options are readily available, nothing quite compares to the rich, authentic taste and soul-soothing fragrance of a batch of homemade apple cider simmering on your stove. Forget complicated gadgets or a trip to the orchard for fresh pressing – this easy recipe proves that crafting delicious, seasonal apple cider at home is simpler than you think. It's an experience that not only yields an incredible drink but also transforms your kitchen into an aromatic haven of fall bliss.
Why Opt for an Easy Homemade Apple Cider Recipe?
There's a magical quality to making things from scratch, and apple cider is no exception. Beyond the sheer satisfaction, choosing a homemade apple cider recipe offers several compelling advantages:
- Unbeatable Aroma: Long before you take the first sip, your entire home will be enveloped in the comforting scent of apples and warm spices. It's the ultimate natural air freshener for the fall season.
- Ingredient Control: When you make cider at home, you dictate what goes into it. Adjust the sweetness, spice level, and even the tartness to perfectly match your preferences. You know it's made with real fruit and natural spices, free from artificial additives or excessive sugars.
- No Apple Press Needed: Many shy away from homemade cider, assuming it requires special equipment. This method proves that a simple pot, some basic straining tools, and a bit of patience are all you need to create a truly spectacular brew. For more detailed insights into making cider without a press and its versatile uses, check out our guide on Make Apple Cider at Home: No Press Needed, Plus Versatile Uses.
- Budget-Friendly: Especially if you catch apples on sale or have a surplus from a trip to the orchard, making your own cider can be more economical than buying multiple gallons from the store.
- A Cozy Tradition: For many, making a batch of warm, spiced apple cider becomes an annual fall ritual, perfect for cozy evenings, holiday gatherings, or simply savoring the season.
Gathering Your Essential Ingredients
The beauty of this easy homemade apple cider recipe lies in its simplicity. You don't need a lengthy list of exotic items. Here's what you'll need to create the best homemade apple cider of your life:
- Apples: Naturally, the star of the show! You'll need a generous amount, roughly enough to fill a large pot.
- Water: Just enough to cover your quartered apples in the pot.
- Sugar: Start with about ¾ cup of white sugar, but remember, this is adjustable to your taste.
- Spices: Cinnamon and allspice are classic choices, providing that iconic warm, comforting flavor.
- Optional Citrus: A fresh orange or lemon can add a bright, balancing note to the richness of the apples and spices.
Choosing the Best Apples for Your Cider
The apple varieties you choose significantly impact your cider's final flavor profile. Don't be afraid to experiment!
- For Sweet Cider: If you prefer a cider with a naturally sweeter foundation, opt for varieties like Gala, Fuji, Honeycrisp, or Golden Delicious.
- For Tart Cider: Crave a tangier, more robust flavor? Reach for apples like McIntosh, Pink Lady, Granny Smith, or Braeburn.
- For a Balanced Flavor: The secret to truly dynamic cider often lies in a blend! Combine sweet and tart varieties for a complex, well-rounded flavor that offers the best of both worlds. A mix of Honeycrisp and Granny Smith, for example, is a fantastic starting point.
For an even deeper dive into apple blends, spice variations, and advanced storage techniques, be sure to read our comprehensive guide: Best Homemade Apple Cider: Apple Blends, Spices & Storage Tips.
The Magic of Spices (and Beyond!)
While cinnamon sticks and whole allspice berries are the traditional stars, don't hesitate to personalize your spice blend:
- Cinnamon Sticks: Whole sticks provide a more nuanced flavor than ground cinnamon, which can become gritty.
- Whole Allspice Berries: Add a warm, peppery, clove-like note.
- Consider Adding: A few whole cloves, a star anise pod, a slice or two of fresh ginger, or even a pinch of nutmeg can elevate your cider to new heights. The key is to use whole spices, as they infuse flavor without clouding the cider.
Step-by-Step: Crafting Your Easy Homemade Apple Cider
This method focuses on simplicity, allowing you to create a delicious brew without specialized equipment. Get ready for your kitchen to smell incredible!
- Prepare Your Apples: Give your apples a good wash. You don't need to peel or core them! The skins add color and flavor, and the cores will be strained out later. Simply quarter them and place them in a large stockpot or Dutch oven.
- Add Water: Pour in just enough cold water to completely cover the quartered apples.
- Introduce Sweetness & Spices: Stir in your white sugar (remember, you can adjust this later!) and add your chosen whole spices (cinnamon sticks, allspice, etc.). If using citrus, add it now as well.
- Simmer to Perfection: Bring the mixture to a boil over medium-high heat. Once boiling, reduce the heat to low, cover the pot, and let it simmer for at least 2 hours, or up to 4 hours. The longer it simmers, the more flavor will be extracted, and the apples will soften considerably. You can also make a batch of hot homemade apple cider in a slow cooker for ultimate convenience, letting it steep for 4-8 hours on low.
- Mash and Strain: Once the apples are very soft and mushy, remove the pot from the heat. Carefully, using a sturdy ladle or potato masher, press down on the cooked apples to extract as much juice as possible. This step is crucial for maximizing flavor and yield.
- Strain for Clarity: Place a fine-mesh sieve or colander lined with cheesecloth over a large bowl or another clean pot. Carefully pour the apple mixture through the sieve, allowing the liquid to collect below. Use your ladle to press down on the solids in the sieve to squeeze out every last drop of flavorful juice. Discard the strained solids.
- Taste and Adjust: Taste your freshly made cider. Is it sweet enough? Does it need more spice? This is your opportunity to add a touch more sugar or even a dash of maple syrup if desired.
Pro Tips for Your Best Homemade Apple Cider
- Don't Peel or Core: As culinary producer Nicole McLaughlin (a.k.a. NicoleMcMom) wisely advises, leaving the skins on adds crucial color and flavor, while skipping the coring step saves time since all solids will be strained out anyway.
- Press Those Solids: Don't underestimate the power of pressing the cooked apples with your ladle during straining. This ensures you extract every last bit of delicious apple essence.
- Slow Cooker Method: For a truly hands-off approach, combine all ingredients in a slow cooker and cook on low for 4-8 hours. The aroma alone is worth it!
- Clean Apples: While you're not peeling, ensure your apples are thoroughly washed to remove any dirt or residue.
Serving Suggestions & Beyond
Once your beautiful homemade apple cider is ready, the possibilities are endless!
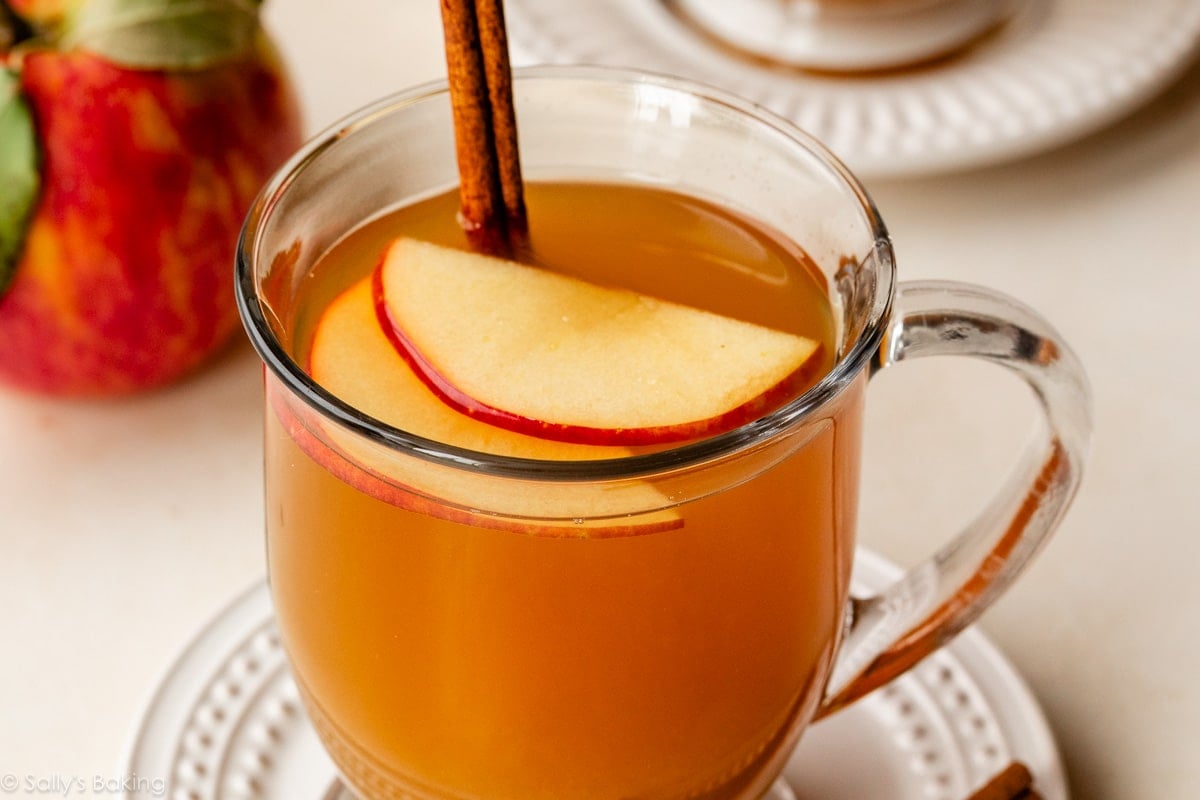
- Serve It Warm: Pour into mugs, garnish with a cinnamon stick or a slice of orange, and enjoy the ultimate cozy beverage.
- Serve It Chilled: Once cooled, serve it over ice for a refreshing fall drink.
- Adult Beverages: Use your homemade cider as a base for incredible fall cocktails like apple cider sangria, a "spiked" cider with rum or bourbon, or even a sparkling cider mimosa.
- Culinary Uses: Don't stop at drinking it! Your homemade cider can add incredible depth to various recipes:
- Use it to make apple cider donuts or apple cider muffins.
- Incorporate it into marinades for pork or chicken.
- Use it as the liquid base for a warming apple cider French toast.
- Reduce it for a delicious apple cider glaze.
Storing Your Liquid Gold
You've put in the effort, now make sure your delicious homemade apple cider lasts!
- Refrigeration: Store leftover cider in a tightly covered pitcher or jar in the refrigerator for up to one week.
- Freezing: For longer storage, freezing is an excellent option. Pour cooled cider into freezer-safe containers, leaving about an inch of headspace as the liquid will expand when it freezes. It can be frozen for up to one year, allowing you to enjoy fall flavors year-round.
- Canning: For the most extended shelf life, consider canning your cider. Follow proper canning procedures for non-acidic beverages to ensure safety. This is a fantastic way to preserve the bounty of fall.
Embrace the Deliciousness of Homemade
Making homemade apple cider is more than just following a recipe; it's about embracing the essence of autumn, creating unforgettable aromas in your home, and savoring a drink that's truly made with love. This easy method proves that you don't need fancy equipment to achieve a rich, flavorful result that far surpasses anything you'd buy in a carton. So, gather your apples, choose your spices, and get ready to brew a batch of delicious fall flavor that will warm you from the inside out. Your new annual tradition awaits!
